Tuesday, January 31, 2012

A New Project....

So here I am finally getting a little motivated. I have been slacking on my projects, and I do have a few of them waiting. So here is a old trunk that I junked picked, and I really mean garbage picked.:) I knew I would eventually need a bigger toy chest for my all the toys my kids are collecting. I have not finished but here is my before picture...hopefully by next week it will be finished and be put to use.


As you can see, a little rough. I did take the handles out, and I sanded and wood filled most of the cracks. It looked as if there was trim glued on the top, I just tried to sand all of the glue off. I figure if it looks too bad, I will put some more trim on the top. I am going to put a coat of primer on tonight...and hopefully get rid of those hideous legs. So any suggestions what color to paint it?

Until next time...Kim
Pin It!

Monday, January 30, 2012

New Rocker

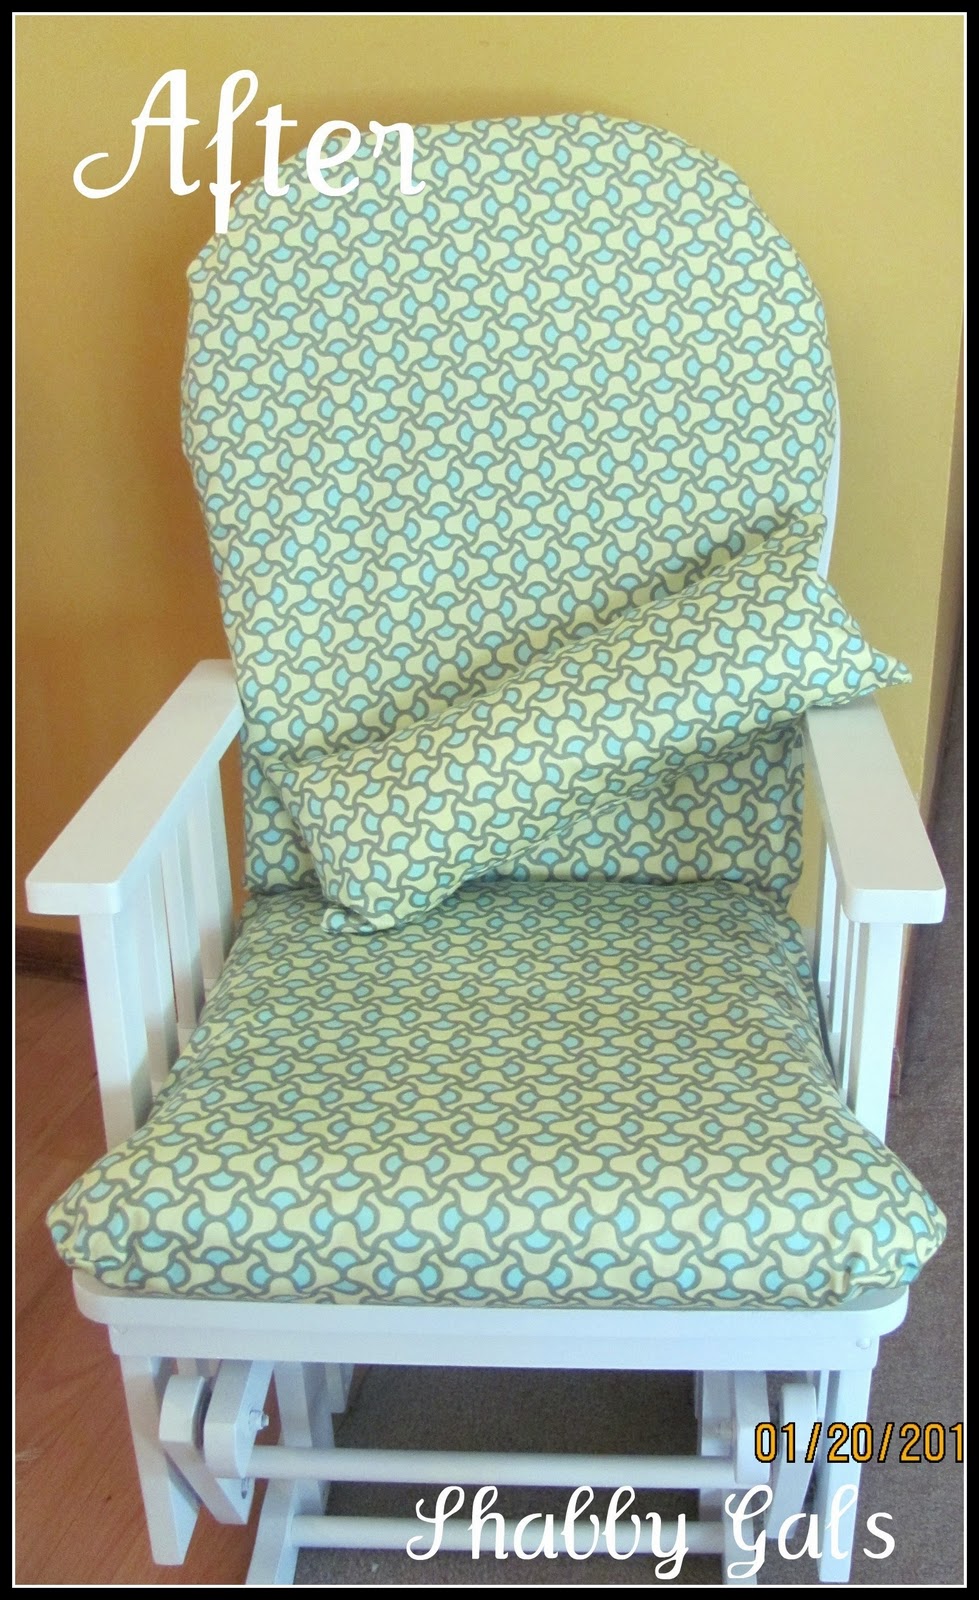
Happy Monday!  Here's a rocking chair make-over for you today.  I found this rocking chair off of craigslist this past summer.  It has been sitting out in my garage while I was deciding what to do with it.  Then...we found out that my younger sister was expecting her first baby so we thought PERFECT she needs a glider!!  Every mother knows that you spend A LOT of snuggle time in a rocking chair...especially a baby's first year of life.  My sister, Kim and I decided that we would re-glamify this rocking chair and give it to her for her baby shower.  Here is the before picture.
Kim and I found this cute Amy Butler fabric at a local quilt store.  We loved the colors and knew it would coordinate well with the nursery.  We also scored the fabric at a decent price!!  We decided that I would paint the chair and she would recover the cushions.  I scrubbed the chair and cleaned it up and then put a coat of primer on it.  I then put two coats of a cream semi-gloss paint on it.  Kim finished the cushions perfectly and then whipped up a cute pillow with her stellar sewing skills.  We love how the chair turned out!  I think Jessica liked it too and I know she is spending some quality time snuggling her new baby in it!  Here's the after picture...
Enjoy your day!!!
Thanks for reading!

Linking up to these parties:


Sew Chatty


The Southern Institute


Pink Hippo Party

http://www.creatingreallyawesomefreethings.com/
http://sumossweetstuff.blogspot.com/
http://brassyapple.blogspot.com/
http://jambellish.blogspot.com/
http://thegirlcreative.blogspot.com/
http://diyhshp.blogspot.com/
http://www.notjustahousewife.net/
http://polkadotsonparade.blogspot.com
http://www.domestically-speaking.com/
http://www.gingersnapcrafts.com
Pin It!

Sunday, January 29, 2012

Chicken Wire All the Way!!!!!!

Found and bought an old cabinet that was missing the glass on the sides and the front.  Jackie suggested redoing the sides and front of the cabinet with chicken wire instead of replacing the glass.  Decided to paint and shabby the cabinet up.  Forgot to take a before  picture because I was so excited to start the redo.   Love it!!!!!!
Dianne


Linking to:  http://itssoverycheri.com/2012/01/28/its-party-time-1-29-2012/, http://missmustardseed.com/
http://www.thevintagefarmhouse.com/http://micheleravendesigns.blogspot.com/
http://twiggstudios.blogspot.com/2012/03/sunday-show-off-linky-party-4.html
http://commonground-debrasvintagedesigns.blogspot.com/
http://sofabulouslyflawed.blogspot.com/
http://romantichome.blogspot.com/
http://frenchcountrycottage.blogspot.com/
http://shabbynest.blogspot.com/
Pin It!

Saturday, January 28, 2012

Sugar Cookie Bars

So here I am again, taking the easy way out.  Making bars instead of cookies.  I am sure you have all seen these bars somewhere in the great wide world of the internet like.....pinterest, and other blogs.  Actually I got the recipe I am using from The Girl That Ate Everything.  Let me tell you she makes everything look good.  I have tried to make sugar cookies and I have either not let them chill enough or I roll them too thin.  So needless to say they have flopped everytime.  So I am trying these bars, because they look delicious and who doesn't like a sugar cookie?

1 cup butter, room temperature
2 cups sugar
4 eggs
2 tsp vanilla
5 cups flour
1 tsp salt
1/2 tsp baking soda
Cream butter and sugar until fluffy. Add eggs, one at a time, mixing after each egg. Add vanilla and mix well. In a separate bowl combine flour, salt, baking soda and stir with a whisk to combine. Add to wet mixture and mix just until combined. Spread on a greased baking sheet (use a 13 x 18 pan). Bake at 375 degrees for 10-15 min, until light golden brown or until a toothpick comes out clean (they won't look done so do the toothpick test). Cool completely and frost.


It is up to you on what kind of frosting you would like to use, but I am also trying the frosting from the recipe I found.

Frosting
1/2 cup butter, room temperature
4 ounces cream cheese (1/2 of an 8 oz block) softened
1 tsp vanilla (I used almond extract for half of the frosting)
¼ tsp salt
4 cups powdered sugar
5 Tbsp milk
food coloring (if desired)

For frosting combine butter and cream cheese until smooth and creamy. Add vanilla and salt. Add powdered sugar in 1-2 cup increments until combined, then add milk a little at a time and mix until smooth and spreading consistency. You may not need all the milk! Spread over cooled cookie bars.

Also my tip is to grease your (clean:)) hand to spead the cookie dough over the pan....it doesnt spread so easily with a spatula.
I also say under bake, they turn out great I think I left them in for 11 minutes. I like a little softer sugar cookie though.


They are delish!

Until next time....


Home Stories A2Z


http://www.newlyweds-blog.com/2012/02/01/newlyweds-recipe-linky-9/
Pin It!

Friday, January 27, 2012

Little Bench

Hello!!  I can't believe it's Friday.....this week has flown by!  I have a little furniture redo for you today.  I found this little bench at a garage sale this past fall.  It's a little country in style, but I thought maybe a little paint could bring it to life again.  The seat opens up and allows for some storage.....which is always a nice option.  Here is the before picture....
I gave it a good cleaning and then put a coat of primer on it.  After allowing it to dry, I painted two coats of Behr's semi-gloss latex paint.  I used a cream color and then distressed it lightly.  Here is the after picture...
 Enjoy your Friday and have a wonderful weekend!!
Jackie

Linking this project to: http://www.shabbynest.blogspot.com/

made in a day
Pin It!